Zen and the Disquieting Art of Motorcycle Maintenance So here we go - part 2 of my bike build is underway and I must admit that I’ve been tested again and again, from snapped screws and bolts to wrong interpretations of manuals and instructions. I find it fascinating that the state of mind in which you begin your mechanical work will have significant consequences on how well you’ll complete the task on hand. This second part will cover build process and upgrades, however it will also include some 'deep thinking' and reflections – I trust most of you who are not professional mechanics can relate to these frustrating situations. You're on top of the world when things go well and you want to rip someones head off when they go wrong. I hope you enjoy this post and remember - It's not really about the bike - It's about you riding it :-)  Which way? anyway will do... Not really... Suspension UpgradeNew bikes’ suspension set up is adjusted to an average rider weight of 75-85 kg (165-187 lb). My weight is 90 kg (200 lb) and in addition the bike will carry extra weight in fuel, navigation equipment and tools so stiffer springs are required. Front standard fork springs were replaced with higher rate WP springs rated at 4.4 N/mm (25.1 lb/in). 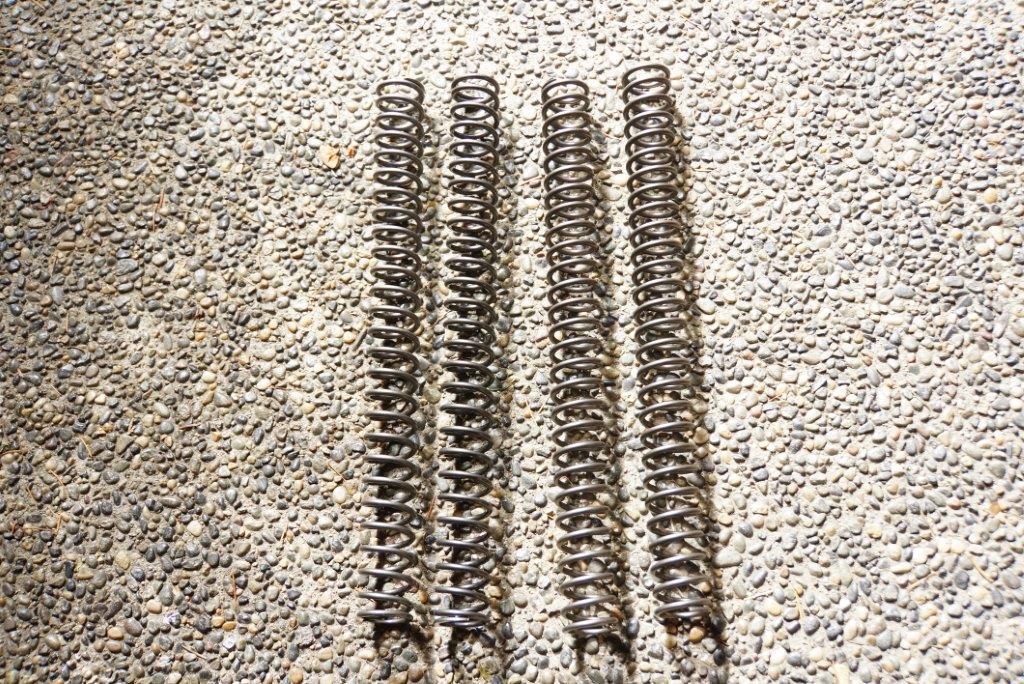 Original springs on left. New springs on right Same goes for rear shock spring – replaced with higher rate - 57 N/mm (325 ib/in).  Shit HappensNow changing springs is considered a simple job and in theory it is... Rear shock removal on the Husky is not as straight forward as it is on the KTM. 5 minute easy removal for the orange machine is more like 30 minutes on the Husky with many parts required to be removed in order to free the entire shock (sub frame, exhaust, bottom shock linkage and other parts). At this stage I'm a pro mechanic in my head, everything goes smoothly and shortly thereafter I have a new black shiny rear shock spring installed and ready for sag adjustment.  Moving on to the front fork: The Husky comes with WP CS4 forks, yes I know, some like them some hate them - I'll share with you my thoughts on performance after the race where they will be tested to the max. To perform a spring change you'll need a special tool to open the cap (make sure you have it handy) and the rest is straight forward: remove cap, remove spring, install new spring, install cap and you’re done right?... Clankkkkkkk I hear the dreaded snap and immediately stop – what has just happened? No way I snapped it, have I? A mix of disbelief, angst and self-blame rush in. I step away from the bike – holy crap I think it’s broken. How bad is it, can I fix it or do I need to replace it all together, for God’s sake man! this is a brand new bike and you already broke it… a quick nervous walk around the bike as I timidly prepare to open the fork cap and examine the damage. Shit, It's broken!!! not a good start and now I can't test the bike - can't ride it until this is fixed. I'm frustrated with myself and decide to call it a day - when things go wrong you might as well step away and let time work its magic. Your thoughts will get clearer and you no longer operate from a stress/fix it now position which can make things worse. There're times where it's needed and you'll do whatever it is to get back on track, but when you have time I suggest you take a breather and shift your thoughts to something else. You'll return to deal with it later with a refreshed approach and probably solve the problem - the right mindset is everything - in mechanics, business, relationships, riding - pretty much in everything you do. I'm the first to admit that I'm far from being a great mechanic, but I'm not afraid to try and learn new things. In this case it's my mandate to learn everything about this machine - every bolt and part - I need to know how to fix it, replace it and troubleshoot it. I must know how to perform roadside repairs and maintenance - where I ride its a long way from roadside assistance...I learned a lot from servicing my old KTM 450 but must admit that these new bikes require a gentler hand and the use of precision tools to get the job done right.  Top of rode thread snapped inside the cap  Lesson learned: manual calls for cap torque at 18nm, this is the lightest setting on my torque wrench and what I've learned is that lowest settings on "not expensive" torque wrenches is usually not very accurate... I hear you guys - get proper tools man :-) They say good lessons are expensive - they sure are! Ordered a new rode and of course they sent the wrong one so with 3 days to ship the bike to Baja for my upcoming race - Baja Rally 3.0 I'm all stressed out about getting it on time, install it and test the bike before I pack it up. OOOOOO the troubles of a one legged Dakar Rally Racer :-) Next step - Radiator Braces I had my share of bent radiators in my past... 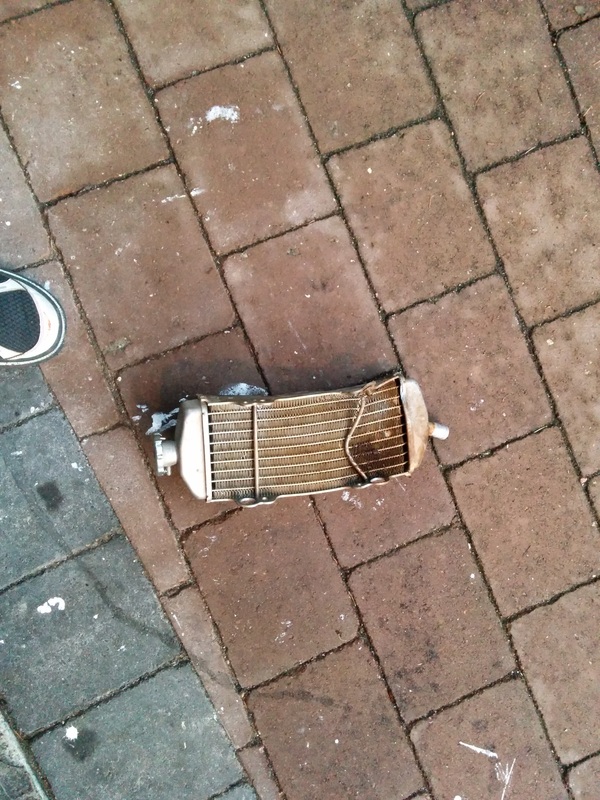 So decided to take proper precautions and properly protect them 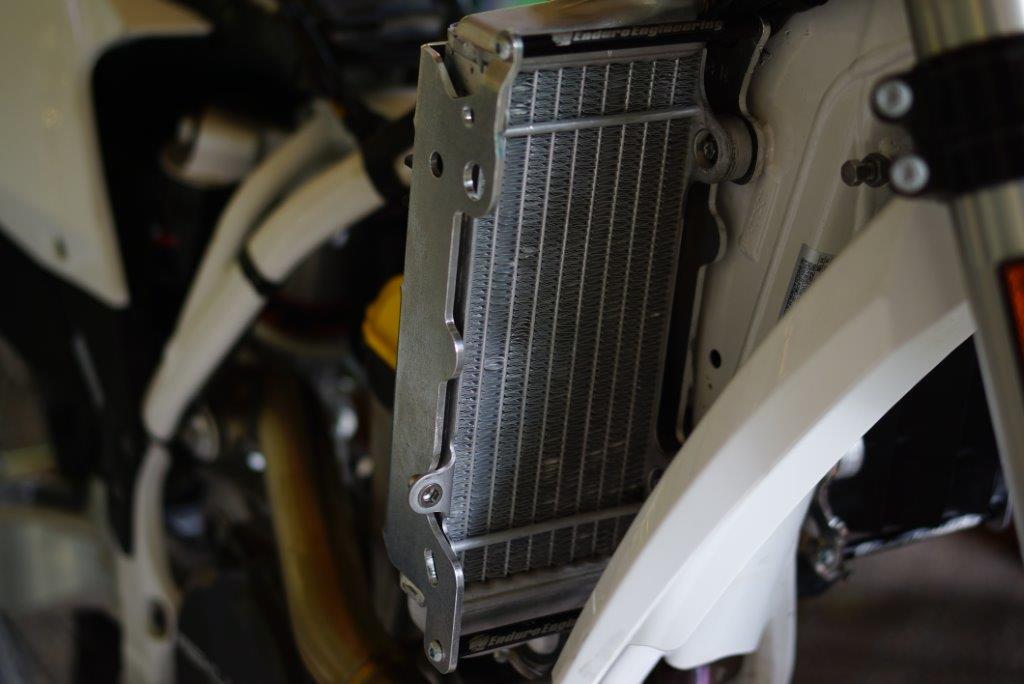 Enduro Engineering radiator braces installed! - Thank you Bob from Cyclebuy Oregon! Bob and his team have been extremely helpful, patience and supportive of my project. Bob's advise on parts and rally mods were awesome and he provided very competitive pricing on parts which helped me make it to this year's Baja rally.  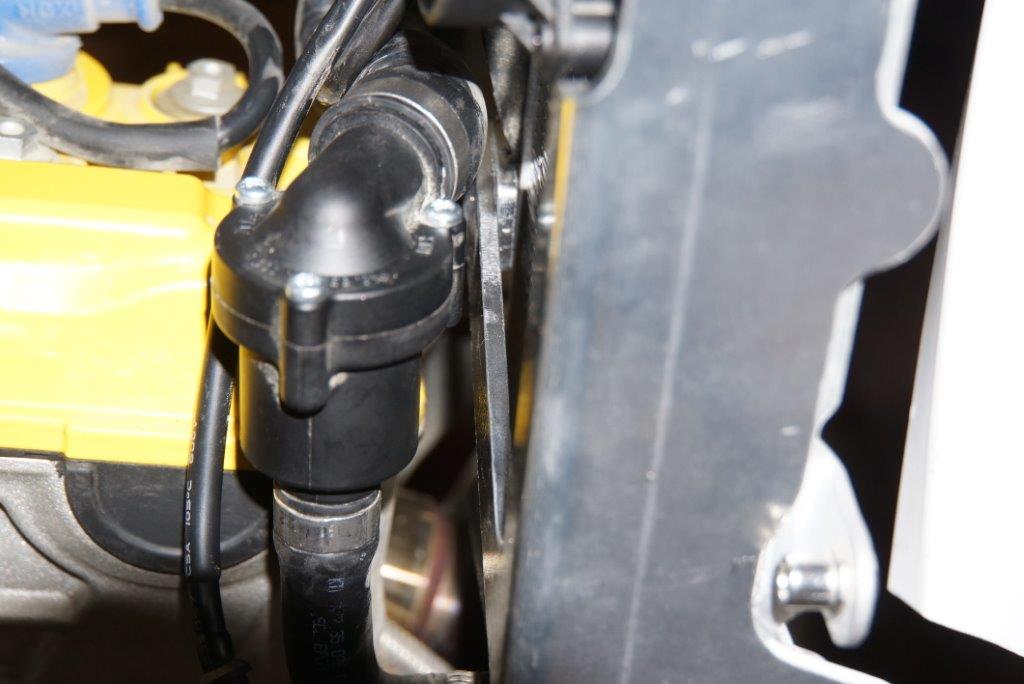 A little tight on the right side. Couldn't install original screw, and hopefully it will not rub too hard against water hose Steering and controlsI'm 6.3" tall with long arms, one good leg to stand on and limited range of motion on my prosthetic side - it was vital I take care of ride ergonomics and comfort to allow me to stand for long hours and control the bike properly. You've seen the foot peg upgrade on my previous post where I got modified Pivot Pegz done by Ty Davis, owner of Zip-Ty Racing - they provide a wide comfortable platform to stand on and hopefully will assist with steering the bike from the pegs. Next is a Scotts Steering stabilizer- this wonderful little device can be adjusted on the fly to handle different terrain conditions and provide better steering stability specifically in fast sandy sections. 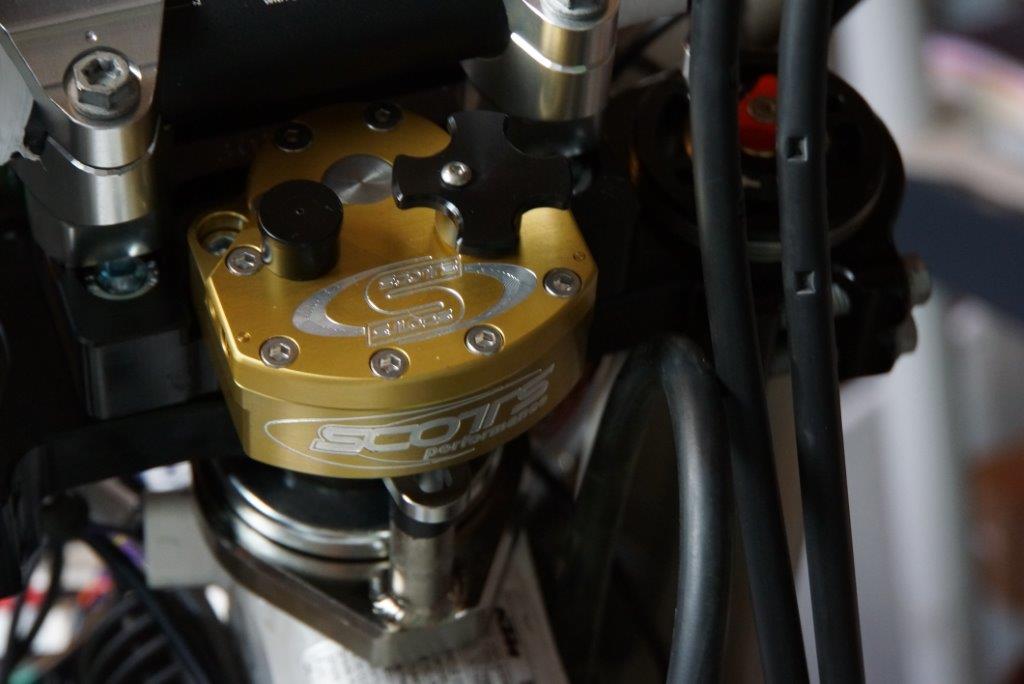 Install was straight forward - just make sure you clean the factory thread lock residue in your triple clamps first. I had trouble using replacement bolts that came with the stabilizer and it took me some time and a friendly phone call to Scotts support to figure out the problem. Only issue I ran into was with the front part of the frame bracket where it didn't allow installation of wiring harness mount to its original position. 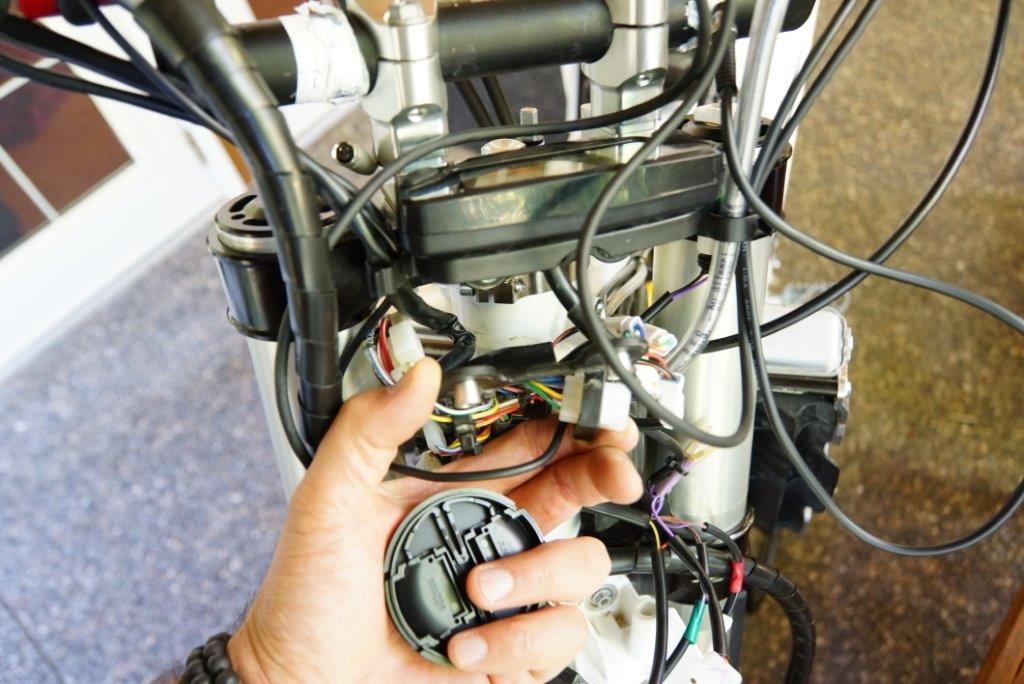 Factory harness mount has a bulky plastic channel that touches steering head so once Scotts frame bracket is installed the pinch bolt (as seen under speedometer) doesn't leave room for it to be reinstalled 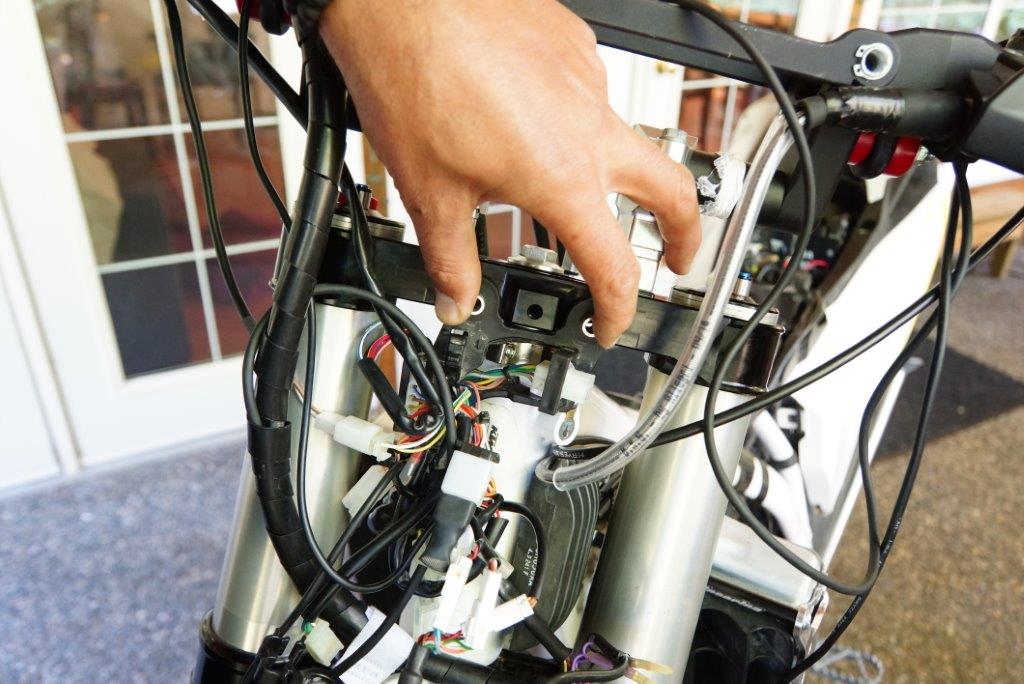 Quick solution was to cut back part of harness mount that created enough room to reinstall it using original hardware and provide enough room for side to side movement. Other option is to use spacers and longer bolts but I didn't want to push the harness forward as I need the extra room for additional wires. Upgraded handlebars: Flexx Handlebars I'm grateful for Fasst Company to have joined my team and support my Dakar 2017 project. These guys are passionate, love our sport, extremely knowledgeable and very helpful - they want to see me do it and decided to back me up - thank you guys! I received their Moto High bar which is their tallest handlebar: 116mm tall and 32' wide with a 54mm Sweep. This bar is designed for long distance riding and has built in damping elastomers that will be a God send while riding for many long hours on rough terrain - keep your eyes open for ride report after the rally. In addition I installed their Flexx handguards which easily integrate with the Flexx handlebar. Some tapping work required for install and then 2 bolts on each end and you're done! 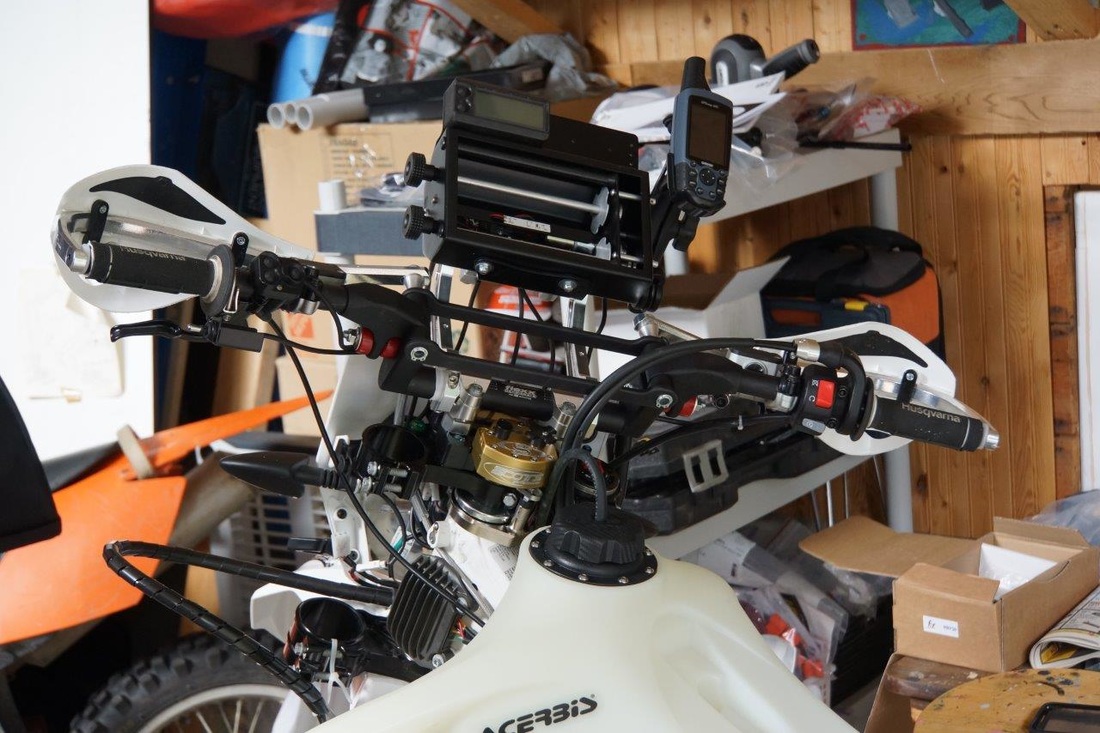 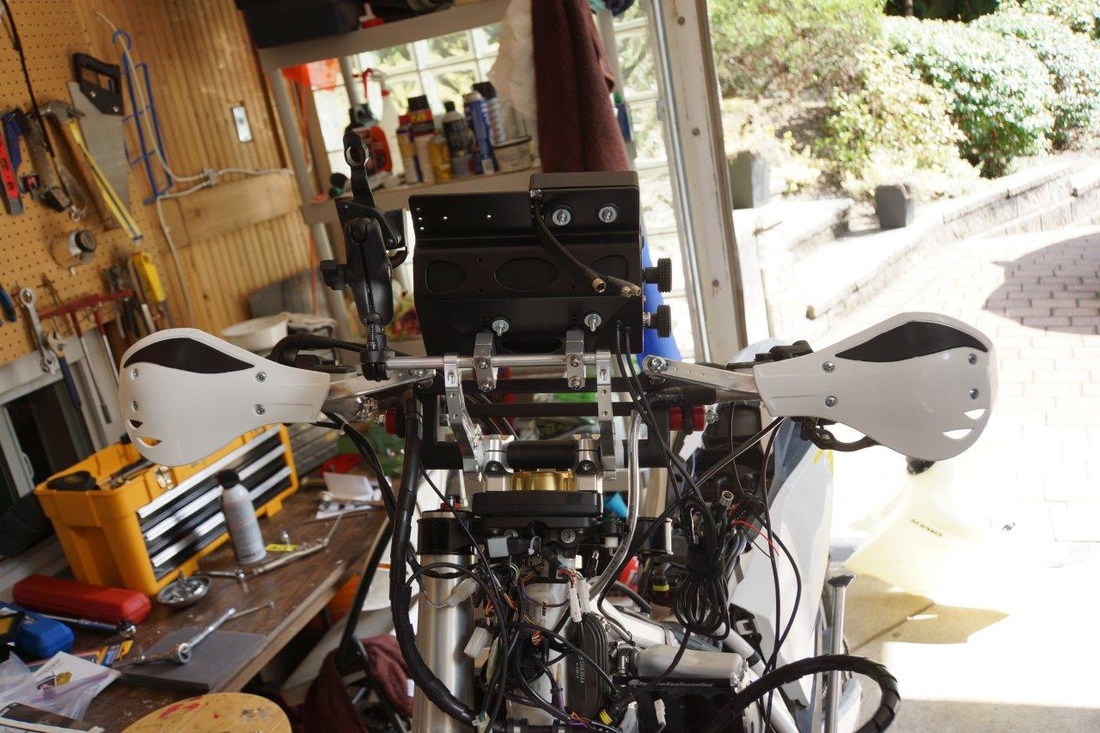 Next post will cover navigation equipment, wiring challenges and other bits and pieces
Almost there... |
 RSS Feed
